|
Why another DIY printer?
The original expectation was to combine several existing technologies to create a demonstration 3D printer. It could not be hard to move a 3D pen around suspended on strings, could it? And it seemed that there were many other effectors available using such materials as clay, sugar, paste, chocolate, concrete and other materials. It was such an obvious idea to just allow the effector to be changed to suit the object to be created.
Thus began an extended learning experience. |
Strings?
|
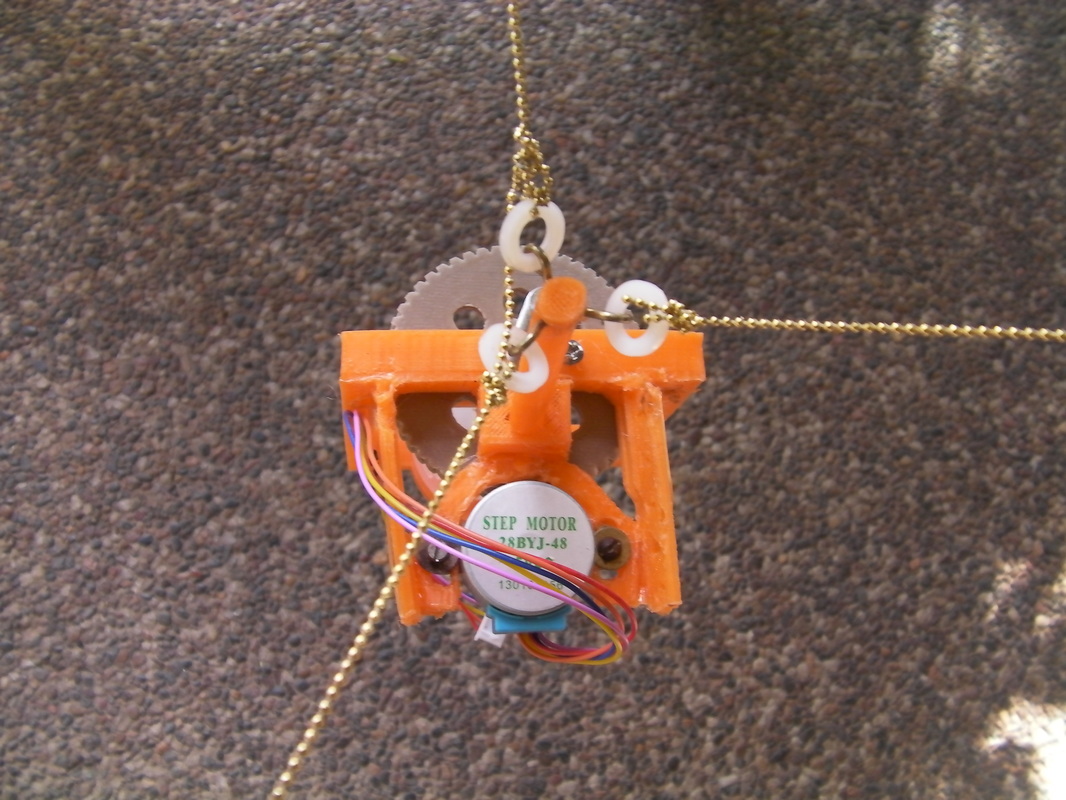
In 2013, I had some success using a light ball chain as string with two very lightweight stepper motors to draw in two dimensions. (Thanks to Marginally Clever for the idea.) For movement in 3D, the minimum requirement is to have three motors. In robotics terms, there are three degrees of freedom so the machine needs three motors; It is just a mapping exercise to convert X, Y, and Z coordinates into string lengths from each of the three motors, and vice versa. Even an arduino can handle that level of calculation.
|
Which material? |
Need something cheap and easy to print with, at least until the concept is proven. Once it works, then improvements are far easier to implement.
Printing a solid panel 1 metre by 1 metre by just 5 millimetres requires a bit over 5 kilograms of ABS plastic and about 6 kilograms of PLA plastic. Of course, the panel can be printed with less fill, but that requires placement accuracy to less than 1 millimetre and a small nozzle (say, 0.5 millimetre) which causes the panel to take a long time to print. The cost of the plastic filament is bad enough, but the time to print is impractical. Buildings can be made of concrete and concrete can be pumped. However, the properties of wet concrete become problematical for unsupported placement; if the concrete is wet enough to move easily with an auger, it collapses far too much to be practical for a 3D printer (same problem for clay and playdough). Besides, how heavy is a self-supporting 3 metre by 3 metre by 3 metre structure, even if it is hollow? The examples found by searching the web suggested several tonnes might be the result. Material cost increases very quickly as size gets bigger (to double the linear size is eight times the volume of material). Using a waste material is one way to minimise the material cost. Besides, minimising the impact of the end-of-life disposal is also desirable, especially for test prints. All of the considered material can be made to work, but not using readily available technology (that is, in the public domain)! I decided on using paper mache because the source material is readily available and free. I've made hand-made paper, so I reckon creating a micro-machine for paper making might just work. The resulting objects are relatively light, and can either be recycled again or disposed in the garden. Besides, paper mache has been used in the past for making furniture. |
